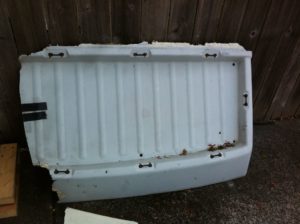
 My project van had driven under something that resulted in the luggage tray being demolished. The luggage lid was torn off completely. It was included in the purchase of the van, what was left of it, on the floor inside.
Scouring through Craiglist to find a replacement luggage lid brought little luck. Eventually, a broken one appeared for sale. It too was broken but fortunately on the other side as my original.
With what was left of mine I used it to repair the newly acquired luggage tray. I cut off part of the corner and grafted it in with fiberglass. After the repair and painting of the top, you can’t tell it was ever damaged.
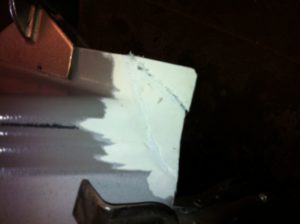 Since there were repairs to the main part of the pop top also that sanded off the original texture something had to be done. Spray testing didn’t work. Brushing didn’t work at all. I’ve worked in the body shop for years and remembered a prep guy that used weenie rollers to make the texture for rockers on some cars that the spray on didn’t match.
So I tried it, and it worked.
Using Interlux paint after it was repaired worked out great too! Using a small thin roller, often called a weenie roller, the texture and coverage were terrific. The paint texture is pretty close and without a side by side comparison by quite discerning eyes, you can’t tell a difference from the original factory texture.
 Taking the pop top cover off was a two-person job. My good friend and neighbor helped me take it off for a couple beers. Sitting on saw horses I first used a 20 percent bleach solution to clean the top and the flocking. After a 10 minute soak in the sprayed on bleach solution and a quick rinse, the inner flocking looked nearly new.
With the flocking looking new it was time to make the fiberglass repairs.
Repairing fiberglass is mostly pretty straightforward. I had done a lot of fiberglass repair for Corvettes working at the Chevrolet dealership. It’s itchy to work with so long sleeves and a good dust mask are a must unless you have lungs and skin of leather. Or want them that way.
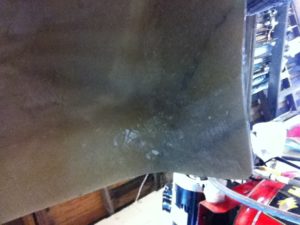 An air saw with a fine-toothed blade or a cut off wheel makes cutting fiberglass parts neat and easy.
Mark your replacement pieces and cut them carefully. Overlap the replacement carefully and cut it to match. A few millimeters short is okay.
Using a grinding disk taper or feather both of the edges of the cut side for at least 2.5 to 3 inches. This gives you plenty of area for the new fiberglass and matting to adhere to while not building up a giant lump.
Welding clamps work out best for the pieces I was repairing. Use something flexible as a backer like heavy cardboard or thin plywood. Clamp the pieces together after blowing the surfaces clean of dust and cleaning any contaminants from the ground area.
Mix up enough resin to cover the first step of the repair following the instructions. It’s best not to make a thick repair all at one time but instead make several thinner layers. It takes longer but it will be stronger. You also want to widen your fiberglass mat with each layer of resin and mat. Multiple layers can be applied at one time placing them on top of the last one while they are still wet.
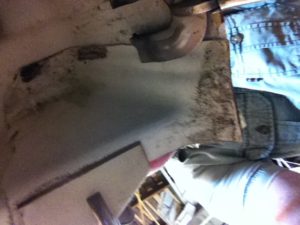 Using a stiff brush or something rigid tap all the air pockets from the resin and matting. Air pockets will reduce the strength and can make more work in the long run. Take your time and work quickly but thoroughly to make sure your resin doesn’t get hard too quickly.
If it gets hard before you finish let it dry. Take a grinder and knock off the surface with 80 grit or 120 for adhesion and finish the build up.
Let the repair cure fully so that it is strong enough to remove the clamps and proceed with the repairs.
After it is cured fully grind it down just below the surface of the surrounding area almost even with the surface. Use some kind of filler to smooth the grinding and sanding marks out. I used Evercoat putty in a skim coat hand sanded it with 80 then 180 before a final sanding with 400 (I am going to roll on several coats of Interlux so 400 is good enough).
Before prep sanding the rest of the fiberglass project use a cleaner to remove any oils or grease that might be pushed into the fiberglass by sanding and grinding. After the repair is done, dried, and paint prep sanded the surface should be cleaned again to remove any oils and anything else that will make paint adhesion fail. Interlux has a series of products designed to work together and it’s usually a good idea to stick to one manufacturer’s product line for best results.
After a thorough wipedown with cleaner you are ready to start painting.
Here are some products that we suggest using when working with fiberglass.
 Transporter Magazine Volkswagen Vans Volkswagen Vans Tin Tops High Tops Westfalia and More



You must be logged in to post a comment.