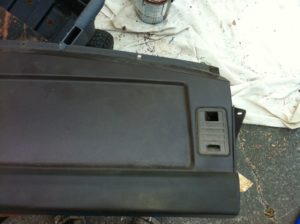
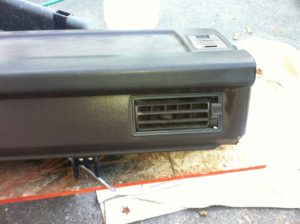
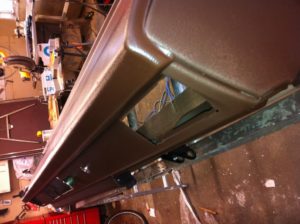
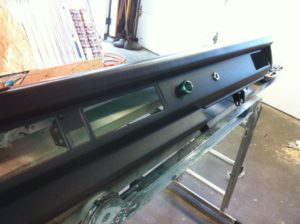
 There are many reasons to take your dash out of the van. Usually and unfortunately it has something to do with the windshield wipers, wiring, or the heater. While it’s out, take a couple extra hours and refinish it to make it look like new.
GoWesty has a great video to show you how to remove the dash from your Volkswagen Vanagon. It isn’t an extremely difficult task. Just be sure you have sat aside uninterupted time and some space to put your dash once it has been removed.
Once you get it out take all the plastic vent parts out and carefully put all the tiny screws and fasteners into a plastic zip baggie so you don’t lose them. Your phone camera will be your best friend if you are forgetful, so take many pictures.
Luckily SEM makes a paint for plastics, vinyl, and leather that will work with the dash, trim, and instrument cluster to make it look like a million bucks.
 Since there are flexible parts the best option is to go with the SEM paint and use the flexible primer if you are going to use the primer. Really the cleaner and the adhesion promoter are the only things needed before spraying the color.
Wash all your parts with soapy water gently but thoroughly first. Scuff the dash and plastic parts gently with a wet scotch pad. Dip it in a bucket of water to keep it wet. After all parts are gently scuffed lay them somewhere clean to dry off. Avoid touching them with oily or greasy hands.
 Once dry, set the parts on to clean paper or cardboard so that you don’t have to move or touch them. Make sure they are secure. The dash is the biggest part so make sure you can move freely all around it to get an even coat of paint on it. Use small block underneath to raise it so that no edges touch the paper. If they do touch it can make lines on the paint where it comes into contact with the paper and creates problems. It’s best to avoid the edges of the painted surfaces from touching any paper or other parts.

Once everything is set up and prepped you are ready to spray on the cleaner. Light layers are always better. Make a quick pass over all your parts to dust them. Wait 2 or 3 minutes and go back and put a heavier coat on but not too much that it runs. You want just enough to thoroughly cover the parts. Once it tacks slightly, usually 3 to 5 minutes depending on your temperature and humidity conditions, you are ready for the adhesion promoter.
The adhesion promotor does exactly what the name implies. Ideally you want to spray it the same way as the cleaner and the same way you will do the color. First a light quick duct coat, then a heavier coat that evenly covers the whole surface. Again, you will wait several minutes for it to tack over. It shouldn’t be wet completely but it shouldn’t be cured dry for an extended period of time.
 The color coat is just as important as the other prep coats that were applied. Light dusting for a tack coat is the first coat. The second pass, after 3 to 5 minutes for flash time, will be more even and covering. Try to overlap your stroke and try to go in one direction. After coverage and waiting for the flashcoat you want to go the opposite stroke to spray so that you don’t have tiger striping. Going across in intersecting strokes help cover better and to prevent striping of the color for a more uniform finish.
Once your paint has dried put all your vents and pieces back together. If you want to add a dash USB charger now is the time to do it (cut your hole before painting though for best results). Carefully reinstall the dash and hook up all your vents and controls.
On the 1984 Vanagon the circuit for the instrument cluster wires are not fused the same way. Pinching them will short the power wires resulting in melted wiring. A very minor thing can cause a lot of extra work so carefully inspect wiring so that it doesn’t get nicked and shorted.
The paint can be used for the remaining hardware and trim in the other parts of the van so they also look new.
 Transporter Magazine Volkswagen Vans Volkswagen Vans Tin Tops High Tops Westfalia and More


You must be logged in to post a comment.